- Knowledge Base
- Microsoft
- Setting Composite Field Labels in Microsoft Dynamics 365 / CRM

Article sections
| Summary: | Instructions on how to set composite field labels in Microsoft Dynamics 365 / Dynamics CRM |
| Article Type: | Information / Troubleshooting / Support |
| Related Product(s): | This article relates to the following products:
|
| Related Articles: |
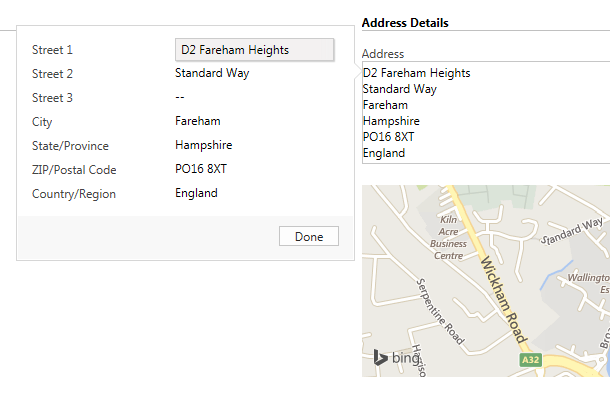
Since the 2013 version, Dynamics CRM has come with Composite Fields for address data. This vastly reduces screen real estate to store addresses and as a result looks a lot tidier. Here’s an example of how it looks:
Clicking the Composite Address field will cause a fly out of the individual address fields. The problem here is that changing the labels of these fields within the fly out is not achievable by changing the labels on the form, simply because they do not exist on the form, only part of the Composite Field. This is slightly annoying here in the UK and other non-American countries where we may wish for the State/Province field to read County, and the ZIP/Postal Code to read just Postal Code.
Fortunately with a few lines of JavaScript and an OnLoad event of the form we can change the labels. It may be worth noting that this solution uses supported methods and does not involved editing the DOM, something Microsoft are very keen for people not to do.
First we need to get the names of the labels of the fields we wish to change. I wish to change the aforementioned fields, State/Province and Zip/Postal Code. The names are these are:
address1_composite_compositionLinkControl_address1_postalcode
address1_composite_compositionLinkControl_address1_stateorprovince
If you wish to retrieve any of the others open up a form with a Composite Field on (I did this in IE11), click in one of the input boxes, before right clicking your mouse and selecting Inspect Element. This will open the browser developer tools and display the following.
The name we want is highlighted below in red.
The next step is to create a new JavaScript file for the page and add an OnLoad function with the following lines of code as shown below:
Save the above file and add it as a Web Resource in CRM.
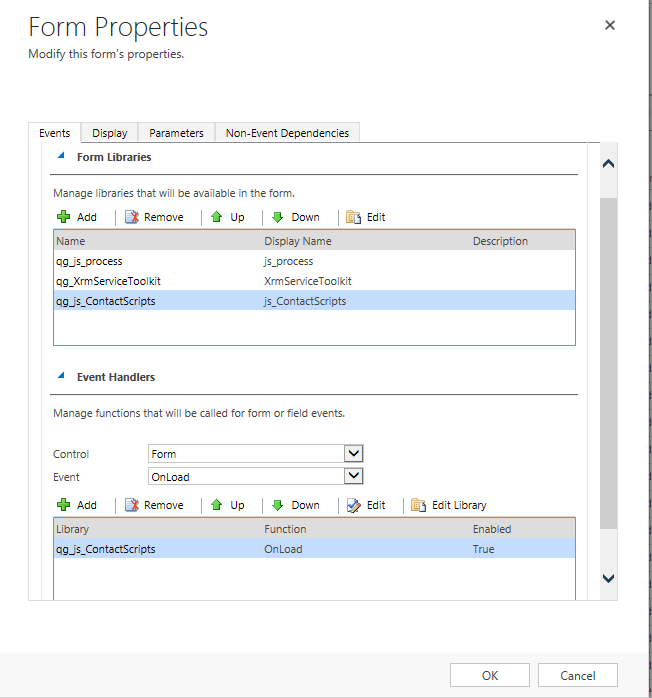
Next navigate to the form where the Composite Field is located and load the script with the form, before adding the OnLoad event. It should look something like the following:
Save and publish your changes.
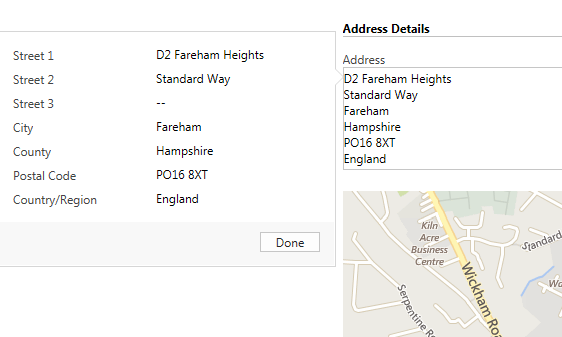
Once you have refreshed your page you should now see the following changes to your Composite Field.
| Related Information: |
Related Articles
- Control your Office 365 users' password policies
- How to add new Entities
- Using Workflow to add Last Activity Date to a Case
- Using a Rollup Field to add Last Activity Date to a Case
- aBILLity Sales Order Processing Solution Compatible with Microsoft Dynamics 365
- aBILLity Standard Solution Compatible with Microsoft Dynamics 365
- How-to: Microsoft Dynamics 365 System Backups
- How to check your Microsoft storage use
- Modifying Silently in Dynamics 365
- Creating Microsoft Dynamics 365 Workflows Tips


