- Knowledge Base
- General
- Create Custom Reusable Controls in PowerApps

Article sections
| Summary: | This article provides step by step instructions on how to create custom reusable controls in PowerApps. |
| Article Type: | How To |
| Related Product(s): | This article relates to the following products:
|
| Related Articles: | |
| Published on: |
|
How to create custom reusable controls in PowerApps
PowerApps provides many useful controls to fit most requirements but there may be times where you need to display data in such a way that the standard controls don’t allow. Thankfully, using some simple formulas and a little out of the box thinking you can combine controls together to create something that meets your requirements, and more importantly, that is reusable in all of your apps with minimal configuration.
In this example, we will be creating a custom control that can display a percentage as a filled bar, somewhat similar to a progress bar. Our control will use 2 numerical values, the “maximum allowed” value and the “current” value.
Before continuing, it is assumed that you have a basic knowledge of PowerApps and the default controls available, as well as an understanding of how to configure the properties on these.
-
- To make testing our new control easier later on, we will firstly add a slider control with the following properties
- Name: sliderPercentage
- Max: 25
- Add 4 new Label controls to your form and give them the following properties
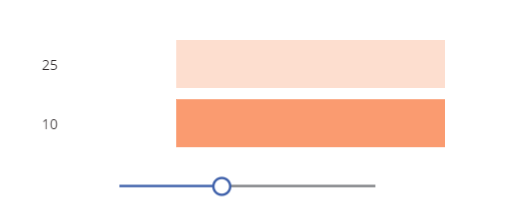
.Label Name Fill Text lblCustomControlBarTotal RGBA(253, 222, 207, 1) blank lblCustomControlNumTotal sliderPercentage.Max lblCustomControlBarCurrent RGBA(250, 155, 112, 1) blank lblCustomControlNumCurrent sliderPercentage.Value - You should end up with something like this.

- Try moving the slider handle left and right and watch how the second number (lblCustomControlNumCurrent) changes
- Next, we are going to add a simple formula which will make our lblCustomControlBarCurrent a percentage size of lblCustomControlBarTotal. To do this, set the Width property of lblCustomControlBarCurrent to the following:(lblCustomControlBarTotal.Width)*(lblCustomControlNumCurrent.Text/lblCustomControlNumTotal.Text)
- Try moving the slider again, now the second bar will increase and decrease based on the input number. Try increasing the width of lblCustomControlBarTotal and watch how the other label also increases in width proportionate to the percentage value.
- We will now make some changes to the properties of our labels so they begin to look more like a useable control. Change the following properties on lblCustomControlBarCurrent
- Height: lblCustomControlBarTotal.Height
- X: lblCustomControlBarTotal.X
- Y: lblCustomControlBarTotal.Y
- Now, add another label to your form and give it the following properties
- Align: Align.Center
- FontWeight: Bold
- Height: lblCustomControlBarTotal.Height
- Name: lblCustomControlPercent
- Text: RoundUp(100*(lblCustomControlNumCurrent.Text/lblCustomControlNumTotal.Text),0) & “%”
- Width: 90
- X: lblCustomControlBarTotal.X + (lblCustomControlBarTotal.Width/2)-(lblCustomControlPercent.Width/2)
- Y: lblCustomControlBarTotal.Y
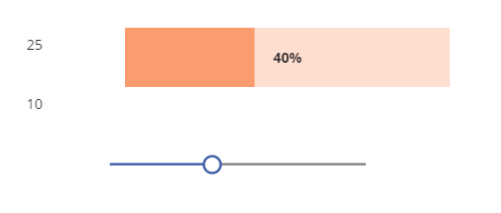
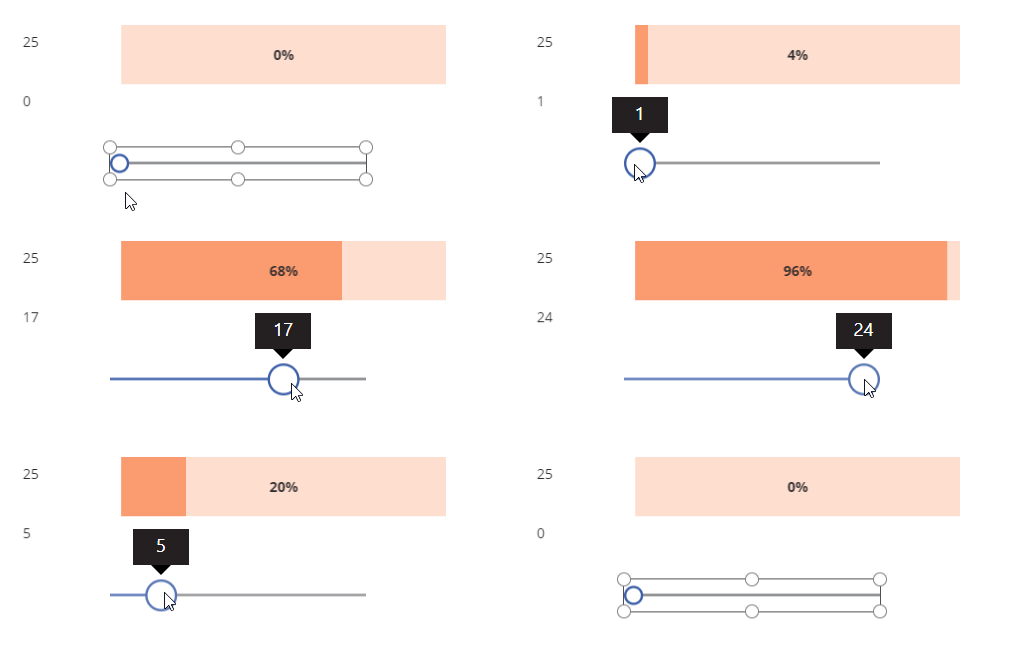
- You should now have a control that looks like this.
 If you wish to move and resize this control it is important that you ONLY move and resize the lblCustomControlBarTotal. All other controls are linked to this so will adjust automatically. If you manually move or resize one of the other labels then the property values we set previously will be lost in favour of specific values.
Now that you have your custom control you can simply copy this into your apps. The slider is not required and you can instead set the Text property of lblCustomControlNumCurrent and lblCustomControlNumTotal to any value from your data source. You may also wish to set the visibility of these controls to false once set up.
What other custom controls can you come up with? Let us know how you are extending PowerApps beyond the out of the box functionality.
- To make testing our new control easier later on, we will firstly add a slider control with the following properties
Related Articles
- How does Power BI Licensing work?
- Understanding Date Fields in the Dataverse
- Power BI URL Filtering
- Microsoft Flow FAQ
- Creating Microsoft Dynamics 365 Workflows Tips
- Adding PowerApps to Dynamics 365
- How to: Creating a "Run Once" Daily Trigger using Power Automate
- How-to: Microsoft Dynamics 365 System Backups
- How to check your Microsoft storage use
- Modifying Silently in Dynamics 365


